With a rise in Office 365 demand, most of the users are shifting to Office 365. The cloud-based facility offered by Office 365 makes it easier for users to access the applications, emails, files on any device, from anywhere and anytime. So, Organizations also moving to Office 365 as it increases productivity and work efficiency. Moving to Office 365 means transferring the Exchange Server mailbox to Office 365 account. So, here we will check out the methods to export Exchange Server 2013 mailboxes to Office 365.
Data transfer from the Exchange server to Office 365 is classified into three categories. Depending upon the mailbox size, exchange server version, and office 365 compatibility users can select any one of them. Check out the Exchange to Office 365 migration options
Types of Exchange to Office 365 Migration
- Cutover Migration: This type of migration supports the transfer of fewer than 2000 mailboxes and uses the Exchange Admin center. This is good for Exchange 2003, 2007, 2010, and 2013 versions.
- Staged Migration: It extends its limits allowing to transfer more than 2000 mailboxes at a time. It supports Exchange 2010 and 2007.
- Hybrid Migration: This type of migration supports transferring 150 to 2000 mailboxes in batches and it maintains both on-premises and Exchange Online mailboxes. It supports Exchange 2010 and 2013.
Looking at the type of exchange migration we can derive that hybrid migration is perfect to move Exchange 2013 mailbox to Office 365. So, once decided, we should be aware of the permissions and pre-requisites of Hybrid Migration
Conditions Required for Exchange Hybrid Migration
- Ensure you have proper permissions for hybrid migration
- Check Mailbox Replication Proxy is enabled for On-Premises Exchange 2013 Client Access servers
- A hybrid deployment is configured between Exchange Online and On-Premises migration
The Exchange to Office 365 hybrid migration process settings are to be enabled which are
- Create Endpoint
- Enable Proxy Server
- Migrate using Exchange Admin Center
- Remove Batches
Check the steps in detail
Creating Endpoint
Create an Exchange migration endpoint. Make sure the connection settings to On-premises Exchange server are correct i.e. running on MRS Proxy Service. Only if the MRS proxy service is enabled remote migrations is possible to and from Exchange online (Office 365)
Enable Mailbox Replication Proxy Service
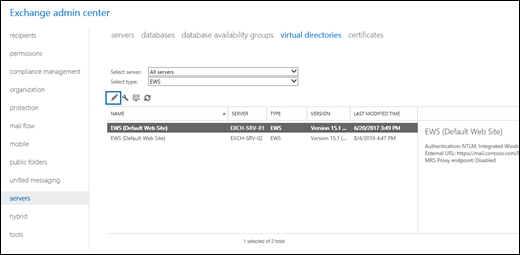
- Log in to the Exchange Admin Center
- Go to the Server and then Virtual Directories
- Select the Client Access Server
- Select EWS virtual directory and click on Edit
- Check-mark the option (Enable MRSProxy) and then click on Save
Export Exchange Server Mailboxes to Office 365
- As all the settings are properly configured, start the migration process
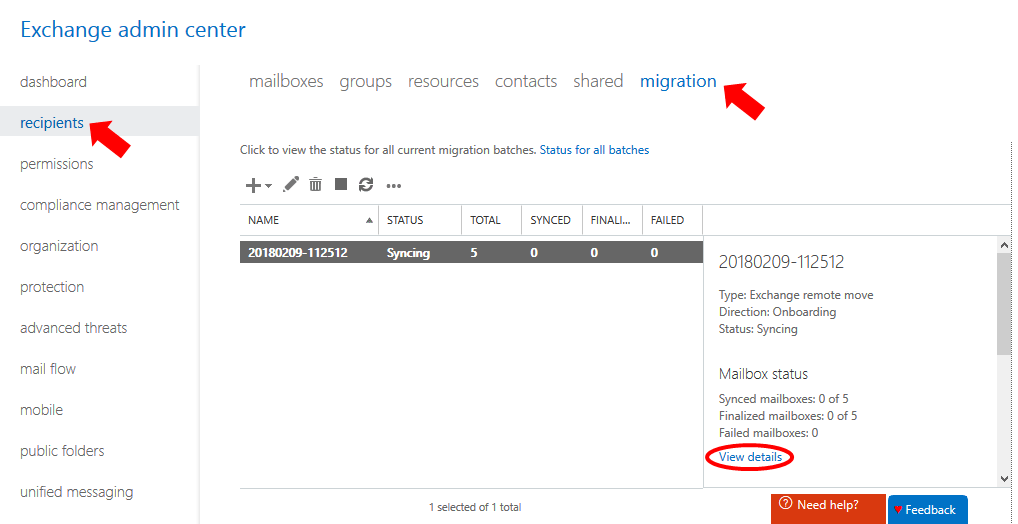
- Open Exchange Admin Center and go to Office 365
- Click on Recipients and then Migration
- Press the + icon and then select ‘Migrate to Exchange Online’
- Select the migration type as ‘Remote Move Migration’ and proceed
- A new page will open to select the users, (mailboxes to be transferred)
- Click on Add + icon, select the mailbox, click OK and Next
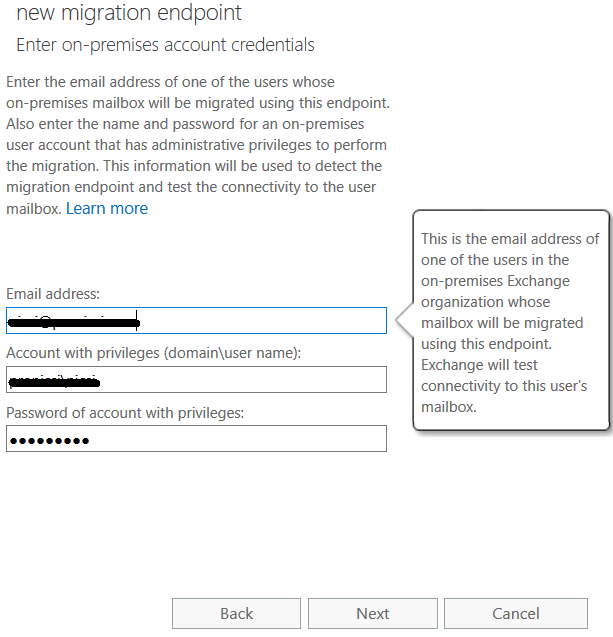
- The Windows User Account Credential page will open, enter the login details
- Under confirm migration endpoint page check that On-premises Exchange Server is listed and click Next
- Create the migration batch in Move configuration page and enter the details
- Click on Start the batch and select one recipient to get information after transfer complete
- Check-mark Automatically complete the migration batch box and select New
- The mailbox will be moved to Office 365
Remove Migration Batches
When the recipient receives the message of successful migration then remove the migration batches. It is essential to remove the batches to avoid errors when the same users are migrated in the future.
- Open the EAC and login with username and password
- Now, navigate to Office 365 and select recipients
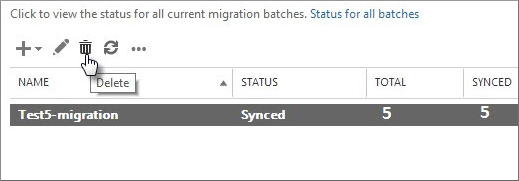
- Click on Migration and then complete the migration batch
- Select the batch and click on the ‘Delete’ option
- Click Yes, on confirmation box
The Exchange Server to Office 365 file migration is complete with the Hybrid Migration method. So, this is the manual and free method to export Exchange server files in Office 365. As observed it involves complex steps and takes hours to complete. Looking at these situations, Stellar developed Exchange server migration software. Compatible, reliable, and easy to use, this software export all mailboxes from the On-premises Exchange server to Office 365 in a few minutes. The software eliminates the steps and does most of the task itself. The user just needs to select the mailbox and Office 365 account. It is highly appreciated by end-users and Database administrators.