Exchange Server is the best means of email communication, file sharing, calendar sharing, and scheduling meetings with-in members of a group in the Organization. It provides a secure and safe environment to send and receive emails. All these data of the user is stored in the mailbox. When you create an account in the Exchange server, you also need to create the mailbox.
Moreover, while transferring from one Exchange server to another, or restoring files after Exchange corruption required the new mailbox. So, we will check steps on how to create the mailbox in Exchange Server. If users are planning for migration, then how to move Exchange mailbox to another database.
Create Exchange Mailbox
Suppose you want to restore data from Exchange Server Backup, then to save data you will require a new mailbox, so create it by Exchange Admin Center.
- To re-create mailbox for existing users first disable it
- Open Exchange Server Admin Center and go to the console
- Type the command Disable-Mailbox “<XYZ>” where XYZ is the mailbox name
- Go to EAC home and click on the recipient’s tab
- Click on the mailboxes tab and list of available mailboxes will appear
- To create new mailbox press the + icon and select mailbox type as ‘User Mailbox’
- A new window will open, asking to add login details
- Now enter your username, organization name, and other miscellaneous details
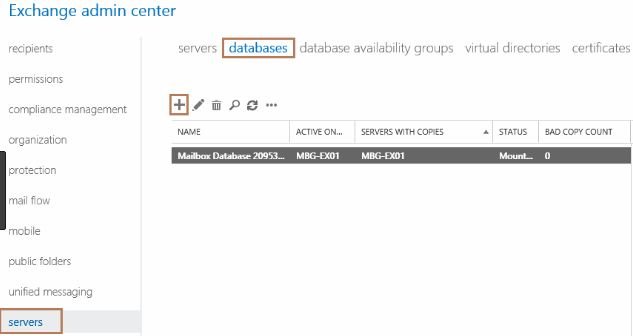
- Select the database to which mailbox is to be attached by clicking on more options
- Finally, click on Save and OK to complete mailbox creation
- The user mailbox will be created and linked to the database required.
Migrate Mailbox to Database within Exchange Server
Organizations adapt the method to separate databases on the basis department and work-type. So, a company can have multiple databases within the same Exchange Server and if a user shifts to another department then his/her mailbox also needs to migrate to that database. So to migrate the mailbox to a different database in Exchange server follow the given steps
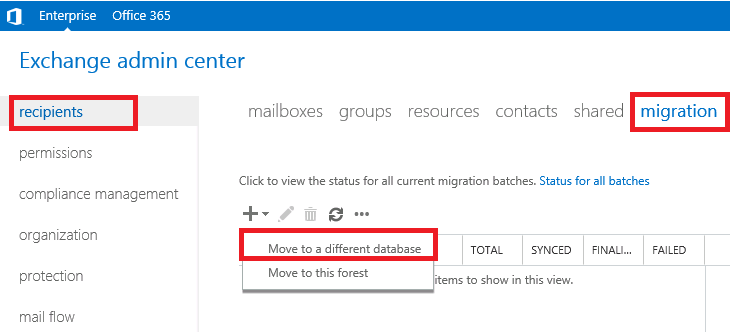
- Open Exchange Admin Center and log in with username and password
- From the recipients, tab select the mailboxes
- Click on Migration tab and click + icon for more options
- From the options available and then select ‘Move to Different Database’
- Now select the mailboxes to be transferred using the move button
- Mailboxes can be transferred in CSV format, so select the CSV file created and move to the database
- Now, a new window will open for batch migration, assign a batch name
- Select where you want to transfer mailbox i.e. Primary mailbox only, Archive mailbox only or Primary and archive mailbox both
- Select the mailbox folder and proceed next
- You can select the account to receive notification about migration status
- Select the option ‘Automatically start and complete batch migration’
- The view details button will show the migration information
- Notification will be sent after successful migration of mailbox
- Check the destination database to know the mailbox is migrated or not
So, this is the simple method to create and migrate mailbox in the Exchange Server database. User must be aware of the Exchange server features to initiate manual migration. If you face any difficulties then try the Exchange Server Migration tool, which helps to remove exchange mailbox errors, fix EDB file problems and smoothly migrate mailbox in easy steps.