Calendar application in Outlook is found to be most useful app for professionals engage more in HR departments, and management. The Outlook application allows these users to share calendar for a particular project and to schedule meetings. This lets the members in a group updated and to carry out task collaboratively.
Here we will learn how to create a calendar in Outlook 2016, how to use scheduling assistant and how to import/export calendar. Outlook calendar provides various features and users can even change the calendar view settings to highlight important details. So, let’s have a look on how to manage calendars in Outlook 2016
Create Outlook Calendar 2016
To create a calendar follows the given steps
- Launch the Outlook application in your system
- Click on the calendar icon in navigation bar to open Options for calendar
- Click on the Folder tab and then click on ‘New Calendar’
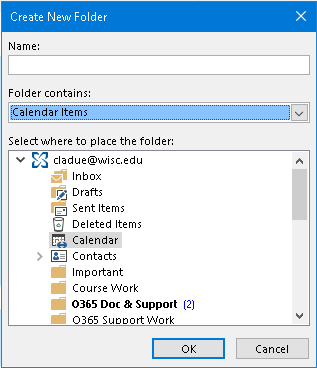
- Now a new window will open, Give name to the New Calendar
- Under the folder contains option select ‘Calendar Items’
- Select the Calendar from the Options listed and click on OK
- Your calendar will be created
How to Use Schedule Assistant in Calendar
- Open Outlook and click on the calendar icon at top of screen
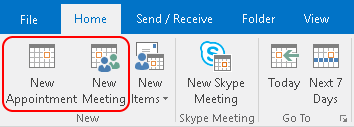
- Click on the Home tab and select ‘New Appointment’ for two persons, if additional members are required then select New meeting
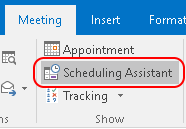
- A new window will open, click on Meeting tab and then select scheduling Assistant
- Now you can add the date, time, duration of meeting and any attendees you want
- Click on ‘Add Attendees’ button at the bottom, this will open the contacts, select the person for meeting
- Click on ‘Add Rooms’ button to enter the location of meeting
- The information of attendees will appear in the calendar grid.
- When an attendee is added the information is shown in colored bar showing their free, busy, out of office timings
Import/ Export Calendar
- Open Outlook and go to File
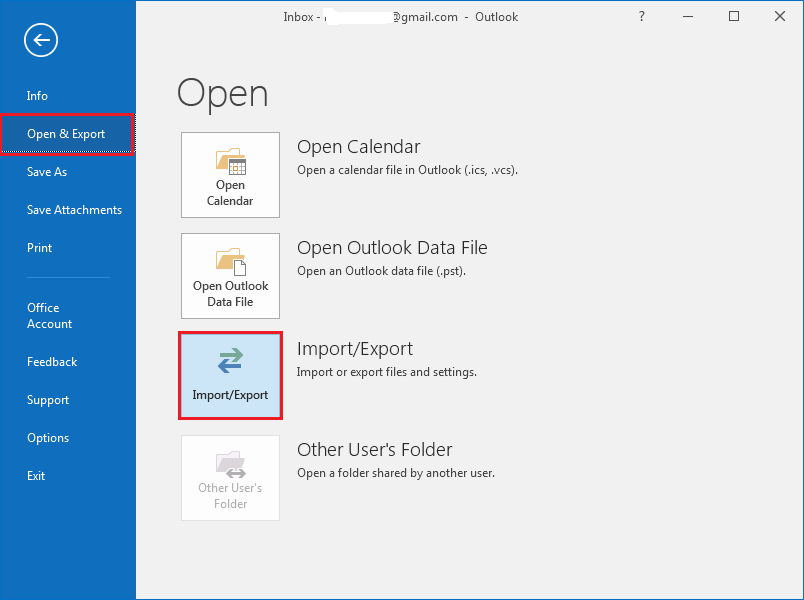
- Move to Open & Import and the Import/ Export wizard will open,
- Click on Import/ Export and a new window will open
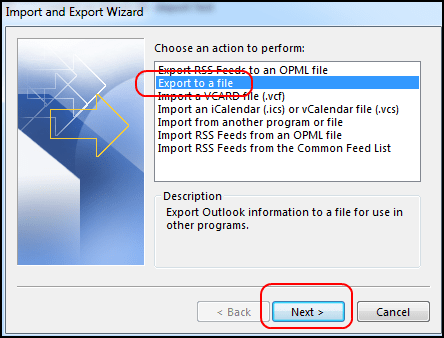
- Select the Option Export to a file and then Next
- Select the export file type as Outlook data file (.pst)
- Click on Calendar on next screen and checkmark include subfolders
- Click on Next to save the calendar in a directory
- Finally click on Finish to export calendar.
Import Calendar
- Go to File, then Open & Import and click on Import/ Export Wizard
- A new window will open as Import and Export Wizard
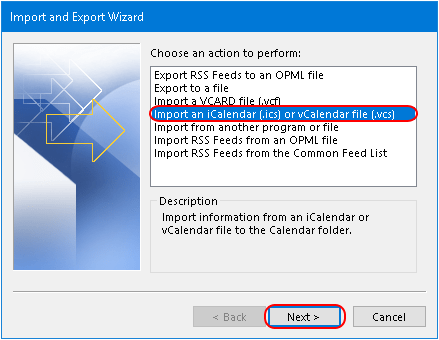
- Select the option Import an iCalendar (.ics) and vCalendar file (.VCS)
- Locate the ICS file you want to import and click on Open
These are the methods by which you can manage Outlook calendar in desktop application.


